Tuesday, April 26, 2011

We are Such Proud Parents!

We have 2 girls!!  On Friday, Fluffy delivered her first, small but perfectly formed, beautiful light green egg.  Our spring gift!  Still not sure about the other bird - hen or rooster we have now wondered for 5 months - we waited.

Yesterday morning I checked the nesting boxes around 11 a.m. and found another beautiful light green egg that was still warm.  Again, Fluffy seemed to be the deliverer.  But all day the girls hung out up in their boxes and were very quiet, which is unusual for them.  Around 4, Dennis heard the same squawking and carrying on he heard on Friday when he discovered the first egg.  He peaked in the boxes, and sure enough there it was - a pale pink egg laid by Amelia.  

Fluffy's 2nd Green Egg (top), Amelia's 1st Pink Egg

Thursday, April 21, 2011

Five Months Old . . . When Will We See An Egg??

A quick chicken update . . .

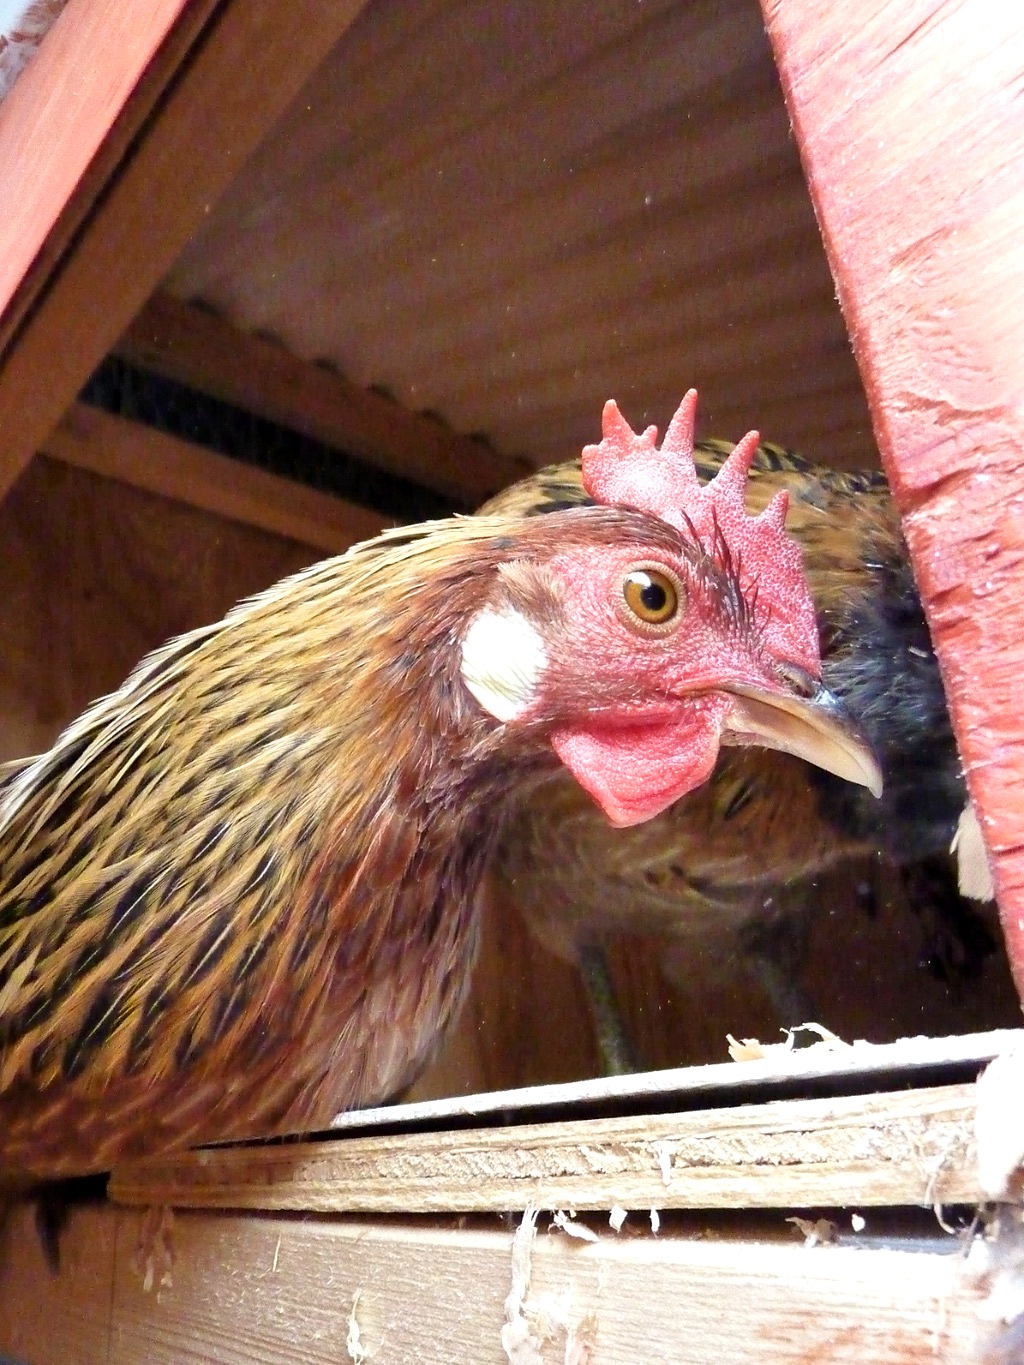
As you can see the girls(?) are getting big!  As Fluffy and Amelia (thinking positively here that both are girls) have grown over the last 5 months, they have developed into completely different looking birds.  Fluffy has stayed true to her name, developing soft fluffy feathers on her cheeks and jowl.  Amelia is much more chicken-looking, with a fully developed comb and wattle.  This definitely concerned us at first.  But, on a recent trip to Halter Ranch in Paso Robles, we thoroughly studied their flock of about 30 hens. We decided that Amelia would fit right in, and we came away believing she will indeed lay not crow.

As our girls have grown up they are full of personality, and you can hear Fluffy squawking from half a block away!  They love most greens and will gobble down a tangerine faster than you can blink.  We eagerly check the nesting boxes twice a day, but no eggs yet . . .

Enjoy the pictures. I will post again when we get our first egg!

Amelia at 31/2 months

Peaking out of the door of the coop

Sunday, March 27, 2011

Yippee! It's Spring!!

Happy Spring!  Posts will become much more regular now that there's lots happening in my attempts to live off my small parcel.  A quick update on the veggie garden:


Seeds vs Seedlings
This year I have thoroughly embraced starting my veggies from seeds.  Maybe it was the plethora of seed catalogs that started showing up in my mail in late December portending of a long summer to come of fresh, homegrown produce that inspired me.  Or perhaps it is just that I am always up for a challenge.  Either way, I culled the catalogs and placed a small order of various veggies.

Many people ask me if it is really worth starting seedlings from seeds rather than going to the local nursery and buying seedlings.  Certainly, it is a lot easier to buy seedlings, plunk them in the ground, fertilize and water them, and await fresh produce.  However, the advantage to starting from seeds are two-fold.  First and foremost, you can get way more variety from seeds.  Pick up any seed catalog of visit any seed company's website (I like Territorial Seed and Baker Creek Heirloom), and you will be amazed.  Who knew there were a zillion types of tomatoes, peppers, beens, etc?  Also, it is hard to find heirloom seedlings, but very easy to find heirloom seeds to start.


Second, is the sense of reward you get seeing the seeds sprout and grow into vigorous plants.  To me this is way more satisfying than purchasing seedlings.  However, having said all of that, if  you are new to veggie gardening and don't want to hassle with starting seeds to get results, by all means go out and purchase seedlings and enjoy the fruits of your effort.

What I have learned
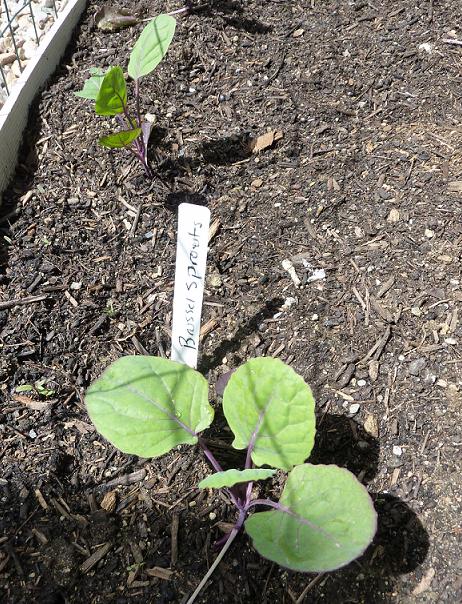
Last month I started purple broccoli, brussel sprouts, and Veronica Romanesco (a type of cauliflower) from seeds in my kitchen.  After the first batch of seeds sprouted into very long and leggy little plants that couldn't hold themselves up, I ditched them and invested in a few resources to have greater success.  

First, I set up a grow lamp.  Basically this is a fluorescent light that you can raise up as the plants grow.  Mine I borrowed from friends, but they are easy and inexpensive to construct or you can purchase kits online (check out http://www.territorialseed.com/product/12132/s for a very good one that looks easy to assemble).  Fluorescent lights also use very little electricity, so raising seeds this way will only cost pennies.  


My kitchen "greenhouse"

Second, I purchased The New Seed-Starters Handbook by Nancy Bubel.  This is an incredible resource for step-by-step detailed instructions for raising all kinds of plants from seed to healthy, productive plant.  Following the instructions the second time around for me led to results that were 100 times better than my first batch.  

Planting Out
Two weeks ago, we took a trip to a nearby city compost lot where we were able to purchase a yard (about a medium pickup truckload) of beautiful organic compost for nearly nothing!!  Check out your local city resources for a great source for inexpensive dirt, mulch, etc.  Way cheaper than going to Home Depot or your local nursery and lugging bags upon bags of dirt and compost to fill the beds! Best of all, many cities offer free dirt and organic compost if you can pick it up (they made charge a small fee to load it for you).

We turned over the beds, pulling out any grubs and weeds, and added about 6" of fresh compost.  We had a lot of compost from our haul leftover, which we placed around fruit trees and shrubs in the yard and shared the rest with neighbors.


After the beds were prepared and I was able to plant the first spring seedlings outside, thereby freeing up space under my grow lamp, I started my summer crop - tomatoes, peppers, and eggplant.  The broccoli, Romanesco, and brussel sprouts have transitioned well to the garden, helped along by some late winter rain.  Now I am awaiting warmer temperatures (we are currently averaging about 65 degrees right now) for them to really take off!

Please follow the blog and share your gardening stories with me!  Also, if you have friends or family getting into gardening or who are experienced green thumbs, forward the link so they can follow as well!!


Tuesday, February 22, 2011

New Year Update - The Chicks are Growing Up!

Wow, it has been a long time since a chick update!  Rather than going into all of the lengthy details of their lives since the last post, I am going to post a few pictures to document their development.

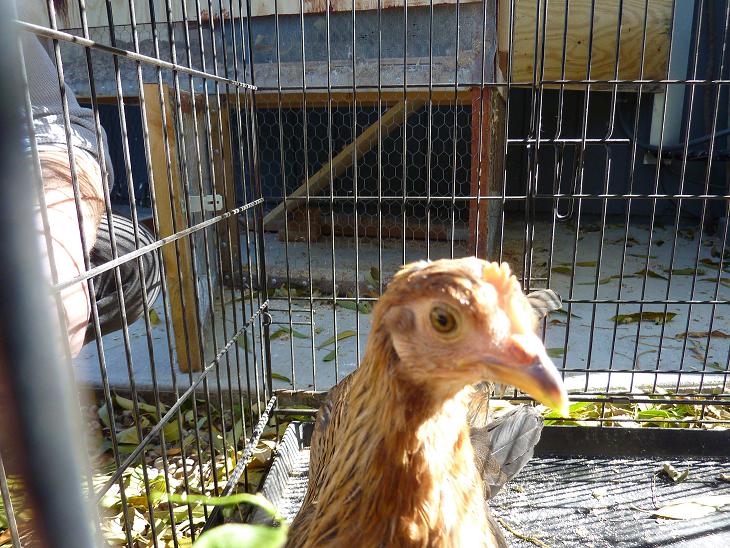
They had their first adventure outside of their coop in early January when the coop got its first thorough cleaning since being occupied in late November.  Though a little freaked at first, Fluffy and "A" adapted to the temporary cage and enjoyed their first sun experience.

As you can see, Fluffy and "A" look dramatically different from one another.  Fluffy, appropriately named, is the fatter one in front, above, with the fluffy feathers on her cheeks.  Here's a closeup of those fluffy cheeks as she eyes some fresh kale.

"A," short for Amelia (or would Amelio be more appropriate??), is leaner with a more developed comb.  Many bets are on whether she is really a he, but the feed store owner told me until it either crows or lays we simply won't know . . .  Here's a picture.  Feel free to wager your own bet!

We are excitedly anticipating finding the first egg within a few weeks.  Stay tuned!

Wednesday, December 8, 2010

Happy 1 Month Birthday!

Amelia and Fluffy turn 1 month old today and boy have they grown!  They have pretty much shed their baby down feathers and Amelia is starting to grow a comb (a little worrisome since we are still not 100% convinced that she is not a HE).  They are curious and silly, and overall a lot of fun.  I have to say, having now raised 2 chicks to teenagers, that it is extremely easy and very rewarding to see them grow up.

We have added a roosting perch, which you can see in the below picture. They love to jump onto and off, duck underneath, and of course perch on it.  I actually found fluffy sleeping, also known as roosting, on it, which is extremely grownup chicken behavior (ahh, they grow up so fast)!  Best of all, the roost offers great diversion and exercise to their daily routine.


Amelia at 1 month, still shedding her baby down
On the roost

The biggest challenge faced by the "girls" as we call them (whether they are or not, it is wishful thinking on our part), is that they are rapidly growing out of their custom drawer housing arrangement.  We moved them out of the penthouse before they were 3 weeks old, and now they are getting too big for their loft (one mesh drawer turned over on top of another).  So we are on the fast track to finish the outdoor chicken coop, paint it, and move them in this weekend.  

Fluffy at the food trough, where they spend most of their time.
We have since relocated the water so they don't poop in it while they are eating!

Stay tuned for an update on the move and more pictures!

Monday, November 22, 2010

The Chicks Are Ten Days Old!

Our chicks seem to have settled nicely into their penthouse suite in the garage, and we have settled into chicken parenthood.  In just the week that we've had them they have nearly doubled in size.  They didn't want to stand up and pose for a picture (since it is way to cozy snuggled up next to the heat light), but you can see that their wing and tail feathers are coming in.


Since everyone asks about names, I will note that only 1 of the 2 chicks has an official name at the moment.  The smaller of the 2 (on the right in the above picture), who managed to jump out of the storage drawer twice the first day we had her, has earned the name Amelia Egghart for being a fearless adventurer and not a bad flyer.  The other chick has not been named yet.  We are concerned, because she is quite a bit bigger than Amelia and has different coloring on her beak and feet, that she is in fact a he.  We are waiting another few weeks for sex to become more evident before deciding on a name.  My 3-year-old niece has proposed Chickee Pie, but I have a feeling this hen may grow out of that name rather quickly!  So, we are open to other name suggestions, should anyone have one . . .

Sunday, November 14, 2010

The Chicks Have Arrived!

For months, maybe even as long as 2 years, I have wanted backyard chickens.  Chickens?! You may be incredulous.  But, in fact, chickens make the perfect pets - they are relatively quiet, loving, bonding, cute(!), and they give you fresh eggs nearly every day of their laying lives, which can be for several years.  Also, chickens are relatively low maintenance.  You give them mash, easily found at any feed store (which, if you do your research you will probably find there are many in most suburban/rural areas), water and a safe place to live, and they pretty much will take care of themselves.  They love to roam the garden eating bugs and having the occasional dirt bath.  And, bonus - their poop is high in nitrogen and great for the garden!

After six months of convincing my husband that this would be fun and a good idea and many months of reading and doing research on chicken parenthood, we embarked on the journey.  Dennis, my husband, along with friend, Yvette, designed the coop and constructed it.  After researching several local feed stores that carry chickens we originally thought we would get pullets - chickens that are 3-6 months old and are either about to or are already laying.  That way we would avoid babyhood and the risk that the cute little hen we are planning on laying eggs turns out to be a rooster (most urban/suburban cities forbid owning a rooster unless you have a legal farm).

Oh, but those chicks are so cute you can hardly resist them!  So, despite previous plans, yesterday we made the whoppingly big purchase of 2 Ameraucana chicks (3 days old), food and wood shavings, which cost a total of $35.  Heavily invested in this project (can you detect the sarcasm?), we headed home to figure out where to keep our chicks until they are big enough move permanently into the outdoor coop.  Since we didn't plan on getting chicks at all, we needed to find a secure box-like structure that could stand up to pecking and pooping for the next 12 weeks or so until the hens are big enough to move into the coop.

The Chick High-Rise Condo
Luckily, we had a drawer storage unit that we are no longer using that makes a perfect high-rise condo structure for the newest additions to our family.  They have moved comfortably into the penthouse, as you can see in the photo above.  There is clear plastic covering the bottom of the drawer.  We attached a utility light to keep them at a comfy 90 degrees and put down some wood shavings for cushioning. They have their food and a little water bowl.  After 2 escapes by one of the chicks (how she survived for who-knows-how-long under the washing machine is still a mystery), we put a little chicken wire on the corners to keep the chicks in and the curious cats out.  In 2 months or so, we'll be able to move them into the coop.  


Since I'm a new mom, I can't resist a few pictures.  More to follow in the coming days, as our chicks grow and change . . .


Monday, October 18, 2010

The Case of the Giant Lemon

Starting about a year ago, we began noticing behemoth citrus fruit forming on our Meyer lemon tree.  At first it was a funny and curious finding.  Was there a Pomelo grafted to the same trunk?  Is the tree planted over a nuclear waste dump or leaky sewer pipe??

The tree, a dwarf Meyer lemon, was purchased from Home Depot in Napa, CA and transported in its original pot to Vista, CA with us 7 years ago.  We found a permanent home for it in the ground when we removed an 80s-era giant satellite dish in our side yard.  The spot was perfect for our "Charlie Brown tree." Happily in the ground, it gets plenty of sun, has set deep roots, and was able to grow out of its pathetic Charlie Brown state into a full-sized bigger-than-dwarf lemon tree with branches that extend 25 feet up.  The tree has been vigorous and healthy and has produced a bounty of sweet, juicy Meyer lemons for 3 years.  
Two of our giant lemons with a not-yet-ripe normal lemon in front

Two years ago, the mysterious giant fruit started forming.  It took months for these duck-pin bowling ball-sized fruit to ripen (for those of you not familiar with duck-pin bowling - the ball is about 30% smaller than a regular bowling ball).  Finally, one was ripe enough to pick and we excitedly cut it open.  Would it taste like a grapefruit?  Would the fruit be as juicy as the normal lemons the tree produces?  To our disappointment and not all that surprising, the skin and pith were thick and the fruit was pretty unexciting.  It was lemony in flavor but bland and the texture of the fruit was mealy.  Yuck.

But, the mystery prevailed.  We asked our gardener, friends, and neighbors but no one could explain the case of the giant lemons.  Then, a couple of weeks ago, I was touring a newly re-landscaped backyard a few streets away in the neighborhood.  These neighbors had planted several citrus varieties, and I happened to mention the case of the giant lemon.  Without batting an eye, my neighbor questioned - is it larger than a sofball? To which, I answered "yes."  Thick-skinned and pithy?  Again, "yes." And, not very tasty?  "YES!"

My neighbor explained that fruit trees often sprout branches from very low on the trunk.  All common citrus we find in nurseries today are grafted onto their trunks.  When the new branches sprout from the part of the tree below the graft, they produce the exact species of fruit we have - overgrown, pithy, and basically useless.  When I got home I carefully inspected the tree.  In fact, one sizable branch was growing from very low on the trunk.  And, all of the over-grown fruit were hanging on sub-branches from that one branch.  It became clear as day - half the tree that sprouted from that one branch had giant fruit; the other half from branches above the graft line has normal, delicious Meyer lemons.

We have since removed the trunk-size branch growing from below the graft and have shrunk our tree back to its appropriate dwarf size.  We have also learned that it is important, particularly with newly planted citrus trees, to remove early new shoots that grow from the bottom so as not to let them mature to the point of producing fruit.  That way, the shape of the tree is maintained and there will be no overgrown, inedible fruit.

Case closed . . .

Sunday, September 26, 2010

The Olive Fly Debacle

This spring I was tremendously excited to see a bounty of beautiful olives flowering and fruiting on our 2 Manzanilla olive trees.  Since planting the trees 4 years ago, this is the first year that enough fruit has actually formed on the trees to contemplate curing and eating them.  All summer I have been watching the olives grow, researching when to pick, and thinking about how I want to cure them.

Finally, last weekend, with many of the olives turning black I decided it was time to pick.  I checked some sources on the web and consulted my Sunset Edibles book and learned that if you squeeze the olive and a creamy white liquid comes out, indeed the olives are ripe and it's time to pick.  So excited, I grabbed a stock pot  and began envisioning Christmas gifts of beautiful jars of olives.  As I began picking, I noticed that many of the olives were shriveled and had brown spots (see photo below).  But, not to be deterred (maybe those were just over-ripe?), I harvested about 3 lbs of olives.


Ok, time to figure out what to do with them.  Again, consulting several websites, I decided to water soak them and then brine.  I diligently followed the instructions to sort, selecting olives that are roughly the same size; then gently crack them with a mallet being careful not to bruise the pit; then place them in a jar of water.  As I started the cracking process, I noticed tiny white worms crawling out of the bowl of cracked olives and all over my kitchen counter - aaagghhh!!

Franticly going back to the computer for a search of "white worm in olive fruit" or anything along those lines, I finally turned up the culprit.  The white worms infesting my olives are Olive Fly Larvae.  This, I learned is a fruit pest, along the lines of the Mediterranean Fruit Fly, that is extremely destructive.  Here's a link to a good source for more scientific information about the pest:
http://www.oliveoilsource.com/page/olive-fly-control

And here's a photo of one of the larvae climbing out of a cracked olive from my tree - yuck!


Suffice to say, I learned that there is nothing you can do if your olives are infested with the Olive Fly larvae; 3 pounds of ripe olives in the trash. And just like that, my hopes of jars of beautiful olives for holiday gifts . . . dashed.

Here are some of the things I learned in my research about olives and the Olive Fly:

  • Olives ripen in late October - early November (in the northern hemisphere).  When they are ripe, they are plump; if you squeeze them they will emit a creamy white liquid.
  • Olives can be picked when they are green or wait and pick them once they turn black.  The fact that mine were nearly all black in September was an indication that the trees are not healthy.
  • Signs of Olive Fly infestation include early ripening of the fruit, brown spots and shriveling; if you squeeze infested fruit there will be a small white worm like the one pictured above inside.
  • I have researched ways to get rid of the Olive Fly, but have not discovered a cure as yet. Stay tuned for more information on cures, and if you have any ideas or knowledge, please share! I would love to be able to get rid of the worms and have beautiful, worm-free, edible olives next year!!

Monday, September 20, 2010

Out of Pure Frustration . . .

I am a self-confessed Foodie, excellent cook, and urbanite with a desire to live off my land (my less-than-one-acre in suburban Southern California, that is).  Hence I have embarked on numerous green thumb projects. Some with great successes and many with tremendous defeat.  Out of pure frustration, knowing that there are lots of urban gardeners like me to commiserate with, I decided to start this open discussion of my triumphs and tribulations as I try to truly eat local from my own backyard.